FE system
'xpg' Text-File
Browser utility
DOWNLOAD page
( FE = Freedom Environment )
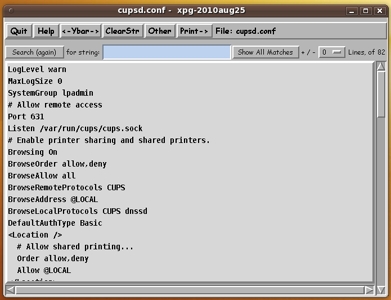
Poke this image to see
the xpg 'Other' options line.
FE system
'xpg' Text-File
|
Poke this image to see the xpg 'Other' options line. |
! Note !
A few notes here may be touched up or revised occasionally
--- especially after a new version is released.
In addition, some screenshots (or install videos)
of 'xpg' may be updated.
< Go to 'xpg' Download Link and Instructions, below. >
(Skip the Introduction)
|
INTRODUCTION : In 2009, I finally 'took the plunge' and migrated my mail, bookmarks, etc. from a (main) Microsoft Windows machine to a (main) Linux machine. I have documented reasons why I went to Linux, along with install notes, on an Ubuntu Install notes page. I had developed a text-file browser utility (written in Tcl-Tk) in my near-retirement working years (circa 1999), to handle browsing large files as a mechanical engineering application support person. The code was developed on Unix (SGI-IRIX), enhanced as needed, but was NOT written in a 'polished' form suitable for dissemination. After I retired, I tried putting that code on a Linux machine, and found that it worked OK with surprisingly few changes, but needed a lot of work --- a more modern handling of fonts within the Tcl-Tk code, for example --- and a better handling of Tk variables via 'central' 'Tk include' files, that would standardize the setting of fonts and colors across multiple Tk scripts. 'Tk include' files could also be used to share procs (procedures) across multiple Tk scripts. So I spent a little time, on and off, from 2008 to 2010, in setting up that code architecture --- with the idea in mind of making a set of utilities that would be suitable for use by other Linux users. Since I am not getting any younger (pushing the big 7 oh), I put 'the pedal to the metal' after realizing that the best way to release my Tcl-Tk (and shell script) code was as subsystems, that could be released as each subsystem was ready ---- rather than doing a monolithic amount of work to release one large code base. The first step was releasing a set of handy 'Nautilus script' utilities. To see the details of that script-development story (along with images of the code of the FE 'Nautilus Scripts'), see the 'FE Nautilus Scripts' Description page or the 'FE Nautilus Scripts' DOWNLOAD page.
Nautilus is/was a file-manager that was part of the Gnome2 desktop system environment that was available from about 2001 to 2010. The Gnome2 desktop was essentially abandoned and rewritten by the makers of the Gnome3 desktop environment. However, some stalwart Nautilus-lovers in Argentina 'forked' the Gnome2-Nautilus system into the MATE desktop environment and the Caja file manager --- which retains the 'popup hierarchical-menu of scripts' capability (part of a 'right-click context menu' capability) --- circa 2010. The web site of the MATE project is at www.mate-desktop.org. Many Linux 'distros' offer a 'distro-flavor' based on the MATE-Caja environment --- which supports the 'Nautilus/Caja Scripts' capability: Next in line (for me to 'publicize') was a first public release of the 'xpg' text-browser utility, whose features are listed in quite a bit of detail on the 'xpg' utility description page. The 'xpg' download file and detailed install instructions are below. For more details on install or 'preferences' options (after the installation files are put in place), see the 'xpg' description page whose link is in the previous paragraph. Or see the 'xpg' help file --- called 'shofil.hlp' --- in the 'helps' directory of the 'xpg' installation. That 'xpg' help file is shown via the 'Help' button at the top of the 'xpg' GUI. 'xpg' uses 'xpg' (another 'instance' of itself) to QUICKLY show the help file. |
|
'xpg' DOWNLOAD LINK and Install Instructions : The 'xpg' install file is a self-extracting shell script. It would be nice if we could simply name it with a '.sh' suffix. But it appears that most web browsers (or, actually, web servers) will assume that it is an all-text file, when, in fact, it has a gzipped tar file appended to the script portion. When the web browser asks for the file from the web server, if the file has the '.sh' suffix, the file will be downloaded in 'ascii' mode instead of 'binary' mode. The binary data in the file (the gzipped tar stuff) gets corrupted. As a workaround, the '.sh' file is provided with a suffix of '.sh.exe' --- in hopes that the web-server/web-browser combo will think the file is a 'binary' file and download it in a 'binary' mode that does not corrupt the file. This seems to work. The '.sh.exe' file downloaded fine for me, using the Seamonkey2 web browser on Ubuntu Linux --- on a little Acer netbook.
Right click here, on this link to the '.sh.exe' file, and, in the popup menu of your web browser, choose to save this self-extracting shell script in a download directory on your machine. (Your web browser will offer an option such as 'Save Link Target As ...'.)
For good measure (that is, as an alternative), the install file is also provided with the suffix '.sh.tar'. So, if the '.sh.exe' file does not work for you (say, the web-server/web-browser 'dance' tries to do something 'funny' with files with a '.exe' suffix), right click here, on the '.sh.tar' file link, and, in the popup menu of your web browser, choose to save this self-extracting shell script in a download directory on your machine. To see the quick version of installing 'xpg', go to the brief SUMMARY section at the bottom of this web page. To see a movie on how to install FE 'xpg', click here (or right-click and save the movie file to local storage). OR, go to the FE Videos page to see the install videos for the several FE subsystems. The install procedure for each FE subsystem is similar --- namely, prepare and run a self-extracting script --- in about three quick-and-easy steps.
NOTE: However, since the author has been the only (known to the author) user of the scripts and other files in the 2011 and 2016 releases, the 'xpg' system has not had the benefit of usage and feedback from lots of users. Hence, it would not be appropriate to call it a '1.0' release. Aiming for a 'mature' release : The 'xpg' FE subsystem installation has been set up so that the startup scripts of the several utilities within it ('FE xpg', 'FE Font Selector', 'FE Color Selector') will automatically figure out the install directory from the full name of the startup script being used to start these utilities. This auto-setting of the install directory should work even if one goes to the FE 'scripts' directory, in a terminal window, and starts an FE script via a command like './xpg' --- for example, when testing changes to the 'xpg' script or the 'shofil.tk' script that it calls, and wanting to see programmer-supplied debug messages and shell interpreter error messages in the terminal window. I am trying to avoid having me (the installation files preparer) or the user hardcode the install directory name (fully-qualified) into the several startup scripts --- especially since there could be 20 or so startup scripts in some FE subsystems. Another advantage of this strategy is that the FE subsystem would still work, even if the user renamed the install directory (from 'feXpg_yyyymmmdd' to 'feXpg', say) or moved it to another location. (The main requirement is that the essentially 'flat', one-level SUB-directory structure of the 'xpg' FE subsystem, and the subdirectory names and filenames, be preserved.) The install steps, in detail : Your home directory or the 'Desktop' directory of your home directory will do, as the download directory. But ... To keep an organized directory structure, you may find it better to make a directory named 'DOWNLOADS', for example, in your Home directory. Then save ALL your 'third party' application install files there, from then on. By 'third party', I mean applications that are not distributed via a monolithic package management system of your Linux/Unix system --- like the FE apps are not. Seamonkey2 (a Mozilla.org web browser, son of Netscape) is another example of such an app. In mid-2010, it was not available in the 'Ubuntu Software Center' nor via the 'Synaptic Package Manager'. I downloaded the Seamonkey2 Linux install file from the Seamonkey website into my $HOME/DOWNLOADS directory --- and I installed it into a $HOME/apps directory that I created for apps that I want to preserve during Linux upgrades. I preserve the apps simply by not overlaying my home directory (and by backing up my home directory as a precaution). Similarly, the FE subsystem self-extracting install scripts can be put in $HOME/DOWNLOADS and most of its files are installed in $HOME/apps. So, the install scripts can be kept in $HOME/DOWNLOADS and almost all the install files are in $HOME/apps --- with a couple more FE 'xpg' installation files in $HOME/.freedomenv, as indicated below. Thus all files of the FE subsystems are in your home directory. The files get backed up if you backup your home directory. Furthermore, the files are preserved (not wiped out) if you preserve your home directory when you update your operating system. Again, to see the quick version of installing the 'xpg' subsystem, go to the brief SUMMARY section at the bottom of this web page. Installation details follow.
Preparing the downloaded First, rename the file --- remove the '.exe' or '.tar' suffix.
If you are positioned at your download directory with a GUI file manager, like Gnome2-Nautilus or MATE-Caja, simply right click on the install file, choose 'Rename' in the popup menu, and use the Backspace or Delete key to remove the last 4 characters from the filename. If you are in a terminal window, positioned at the download directory, you can use the 'mv' (move/rename) Linux/Unix command in a form like this : mv whatever.sh.exe whatever.sh
NOTE: Alternatively, in a terminal window, when you are positioned in the directory in which you put the '.sh' install file, issue the 'chmod 755' command on the filename of the self-extracting script. The format : chmod 755 whatever.sh Content of the '.sh' file : While you are in that terminal window, you can check out the script lines of the file by issuing the 'head -275' command against the '.sh' file. You will see about 272 lines of script text (lots of comment lines) --- and then some gobbledy-gook characters in the terminal window. That gobbledy-gook is the starting contents of the gzipped tar file that contains the 'xpg' installation files. The self-extracting script is a combination of text lines and binary data. If you try to view the install script with a text editor, like 'gedit', it will not view the file, because the editor detects the binary data and thinks it is dealing with a binary file. The authors of 'gedit' do not allow you to try to display the file --- partly because 'lines' in (some) binary data files are thousands of bytes long. As an interesting note (at least I think so), the 'xpg' utility is not as finicky as 'gedit'. If a binary file is not too large (in some sense or another), 'xpg' WILL show the binary file. Of course, most of the bytes in the file show as gobbledy-gook characters in the 'xpg' text area. But you CAN read strings of human-readable text in the binary file. In particular, I tried 'xpg' on the 'xpg' self-extracting script file. It showed the combined text-and-binary file quickly with no complaints (error messages). I could see the text of the script at the top of the file. How to execute the '.sh' install script : If you are still in a terminal after doing the 'head' command on the '.sh' file, you could execute the self-extracting install script right there via the command line. (See a mouse-click method, below.) Enter a command of the form ./whatever.sh That is, type a dot and slash, then type (or 'mouse-paste') the script filename and press Enter. You will see some output from the execution of the script, including Note that the above description amounts to 'full-disclosure' of the install process for the FE 'xpg' subsystem. (More than you wanted to know, eh?)
An alternative to running the If you are positioned at the '.sh' install script (that is, in your download directory) with the Nautilus or Caja file manager, you could double-click on the '.sh' file --- after making sure that it has execute permission, as described above --- and choose the option to 'Run in a terminal'. You will see the messages described above appearing in the terminal that pops up. If the terminal window just flashes and does not stay open (or the installation goes so fast that the terminal window does not even flash), navigate to the '$HOME/apps' directory, and see if the 'feXpg_yyyymmmdd' directory was created. Check if the 'scripts' subdirectory of that directory was created, containing the 'xpg' script. If those exist, then the installation probably went OK. Where the application files 'land' : (via a safer-than-most install strategy) When the self-extracting shell script file executes, it automatically puts a set of directories in a '$HOME/apps/feXpg_yyyymmmdd' directory of your home directory --- where yyyymmmdd represents a release date. Example: $HOME/apps/feXpg_2016nov01 Note that you do not have to change to 'root' to do the install. In fact, I never like having to switch to 'root' to do an install. When I have to supply the root password to do an install, I am being put in the position of having to trust the people who put the install package together that they are NOT going to use that all powerful permission to do serious damage to the root-owned directories and files on my machine --- nor to any other (user-owned) directories and files on my machine. And I am trusting that the packagers are NOT going to install key-loggers or Linux/Unix viruses/trojan-horses on my machine, hidden in that massive directory structure. Or, 'they' could install a 'hidden' program that sends data to an organization (or person), over the Internet, or do some other useless-to-me thing, whenever their program is 'triggered', hidden among all those directories (and when I have my connection to the Internet on). [I, and my wife, have been a victim of these several things on MS Windows. I now setup separate 'admin' and 'user' accounts on MS Windows, similar to 'root' and 'user' on Linux/Unix.] Do you hear that HP, Microsoft, Google, and a large number of software vendors? Cut that nonsense out! At least prompt us, before taking liberties with our computers. For example, let us decide whether we want your programs to start up as part of our computer's boot up process. Maybe we don't want your 'stuff' shoved in our faces every time we log on --- or every time we start up an app in which your (never-going-to-be-used-by-me) stuff has been included as an intrusive plugin. (Hear that, Mozilla Firefox and Google and Yahoo??) So rest easy. This install does not require you to open yourself to damage like mangling of your root-owned directories or commandeering of root-owned processes. And nothing is added to your computer's startup processes. YOU are the one who decides when the 'xpg' components are run. For some simplicity, this install does not ask for an install directory. It simply makes an 'apps' directory in your home directory, if you do not have one. And it makes a directory called 'feXpg_yyyymmmdd' under the 'apps' directory of your home directory. Having apps like this in your home directory can be a real boon at Linux OS upgrade time. If you follow the procedure of preserving your home directory (as a separate disk partition) during a Linux OS upgrade, then you do not have to re-install the 'xpg' utility's installation files, after your Linux upgrade. Since these installation files are not in a system directory like '/usr', they will not be wiped out in a Linux system upgrade. And even if you allow the Linux OS upgrade to wipe out your home directory, if you simply drag your 'apps' directory onto a USB stick (or some other storage device) before the Linux upgrade, you can simply drag it back to your home directory after the Linux upgrade is complete. Size of the installation : After installation, the 'xpg' files occupy far less than 1 Megabyte of space. For example the 2011oct05 self-extracting install script is/was 117,808 bytes in size. The install script expands the appended 'tar.gz' file into a set of installation files that occupy far less than a megabyte of disk space. These are miniscule sizes compared to applications like GIMP or Firefox. I contend that you can get a lot of bang, for zero bucks, from this small set of small files. The sub-directories of the 'xpg' install : The install directories go under that 'feXpg_yyyymmmdd' directory --- fullname $HOME/apps/feXpg_yyyymmmdd. It is a simple, 'flat' directory structure --- only one level of directories. The directory names are There are just a few files in each directory. The main file for the user to be aware of is the startup script --- 'xpg' --- in the 'scripts' directory. Running 'xpg' : If you want to make an 'alias' for the 'xpg' startup script in your '.bashrc' or '.bash_aliases' file, you can use the statement alias xpg="$HOME/apps/bin/xpg" Then, in future login sessions, you can type/paste 'xpg' and a filename at a terminal command prompt to browse the file. There are other ways you can execute the 'xpg' script. You can make a desktop icon for 'xpg', if you wish, as described in the 'xpg' description web page or in the help file available via the 'Help' button on the 'xpg' GUI. Briefly, right-click on your desktop and choose to make a desktop icon which executes the "$HOME/apps/bin/xpg" command. Then you can drag text files to the 'xpg' desktop icon. Or, you can simply add 'xpg' as the default application to use on a large number of text-type files, via your file manager, such as Nautilus or Caja. In Nautilus or Caja, right click on an appropriate type of file and choose 'Properties'. Go to the 'Open With' panel on the 'Properties' options window, and 'Add' 'xpg' by browsing to the file "$HOME/apps/bin/xpg". Or, in Nautilus or Caja, you can add 'xpg' to the 'Open with' list of applications. You see that 'Open with' list when you right click on essentially any file and put your mouse cursor over 'Open With' on the Nautilus or Caja popup menu. Use the 'Other Application...' option at the bottom of the list of applications, to add 'xpg' to the list --- by browsing to "$HOME/apps/bin/xpg". Another way to execute 'xpg' is to make a 'Nautilus script' or 'Caja script' so that you can navigate to and select any text or text-binary file(s) with Nautilus or Caja, and with a couple of mouse clicks, call up your Nautilus (or Caja) script to startup 'xpg' on the file(s) selected. There are instructions (and sample code) on how to make such a Nautilus (or Caja) script in the 'xpg' utility description page --- and in the 'xpg' help that is available via the 'Help' button on the 'xpg' GUI. In summary, I have just outlined 5 ways to implement the 'xpg' script : There would be some corresponding methods if you use the KDE (or other) desktop. I would make a page of screenshots (or a video), stepping you through the process of setting up each of these 'xpg' implementation methods --- but these desktop systems may change somewhat about every six months to a year, as new releases come out. Any attempt to document a technique becomes 'dated' within a year or two or three. |
|
SUMMARY of the install steps : The detailed install description above may sound like a lot, but the install takes only a few steps after downloading the self-extracting install file to your computer :
and all three of these steps can be done in Nautilus or Caja or some other capable GUI file manager. That is, the install can be done with mostly mouse clicks --- rather than using the command line. (The only keyboard use would be the Backspace or Delete key to remove the suffix.) When you double-click on the '.sh' file, there is no need for a progress bar. The install completes in a fraction of a second. To see a movie on how to install FE 'xpg', click here (or right-click and save the movie file to local storage). OR, go to the FE Videos page to see the install videos for the several FE subsystems. The install procedure for each subsystem is similar --- namely, prepare and run a self-extracting script, in 3 quick steps. For more info on
please see the 'xpg' utility description page. Or, see the 'shofil.hlp' text file in the 'helps' directory of the 'xpg' installation. That file is shown via the 'Help' button at the top of the 'xpg' GUI. The 'xpg' script (and a color-selector utility and a font-selector utility) will be accessible via either links with the pathnames
$HOME/apps/bin/xpg or via the pathnames
$HOME/apps/feXpg_yyyymmmdd/scripts/xpg where yyyymmmdd represents a release date. You can proceed to set up
By using the short names, without the 'yyyymmmdd' release ID, you can avoid having to change script names for command aliases and for icons and file-manager menu options, if/when you install a new release of 'xpg'. For details on how to do these setups, see the section called Running 'xpg' above. |
|
Just in case there is some deficiency in the latest release of the 'xpg' system, here are some previous install files --- self-extracting scripts.
You can right-click on any of these links and use 'Save Link Target As ...' (or the equivalent) to save the file in your downloads directory. Then use the 3 simple steps described above to install the (older) 'xpg' system. |
FE Software . . . Helping You Seize the Day. (Carpe Diem)
|
Bottom of this FE = Freedom Environment
NOTE: To return to a previously visited web page location, click on the Back button of your web browser a sufficient number of times. OR, use the History-list option of your web browser. OR ...
< Go to Top of Page, above. >
|